Loading cart contents...
pamphlet stitch tutorial
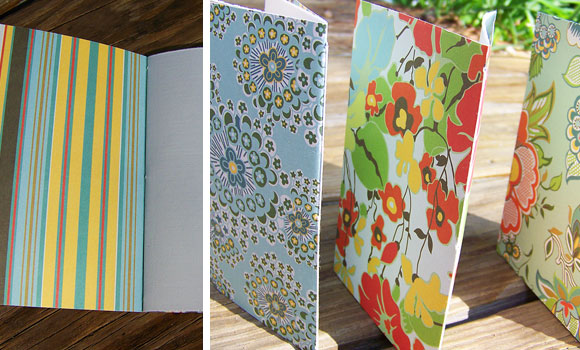
Ready for a new project? This tutorial is for a 4″ by 6″ pocket pamphlet with four pages.
Named ‘pocket’ because it’s small enough to fit in your pocket or purse, not because it has pockets.
Named pamphlet because it is bound with the pamphlet stitch. The pamphlet stitch is good for sewing a few pages together – it won’t hold tons of pages together very well.
Use it for making a multi-page program or greeting card or letter.
SUPPLIES:
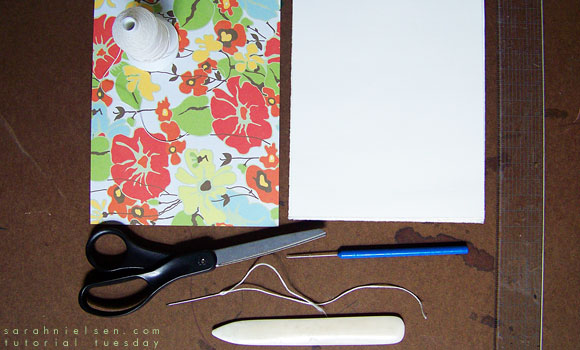
2 sheets of paper for the inside, 6″ by 8″
1 sheet of paper for the outside (I like to use a heavy weight paper), 6″ by 8″
ruler
needle and thread (I used linen thread but you could use yarn, twine, sewing thread, waxed linen thread, ribbon, dental floss, etc)
scissors
bone folder
STEP 1: Make the book block.
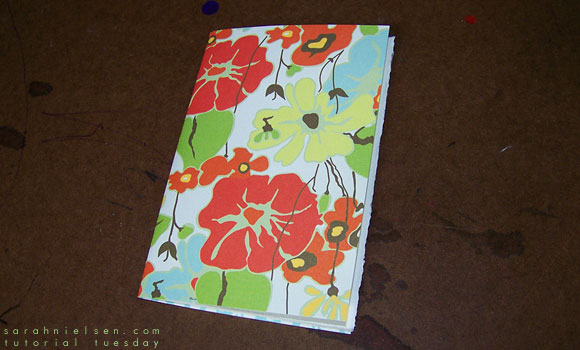
Stack the 3 sheets of paper together and fold in half. Crease with the bone folder.
STEP 2: Prepare the pages for sewing.
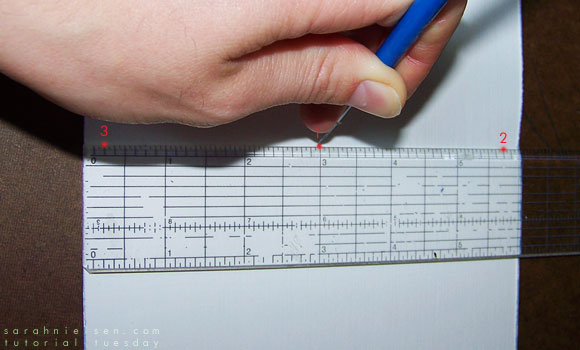
Using your ruler and your needle (I’m using a tiny awl), mark three sewing stations by poking a hole through all three sheets of paper. Station 1 is 3″ from the edge (dead center). Station 2 is 1/4″ from the top. Station 3 is 1/4″ from the bottom.
Please Note: I marked the sewing stations in red so the tutorial is easier to follow – you shouldn’t mark your paper.
STEP 3: Sew the pages together using the pamphlet stitch.
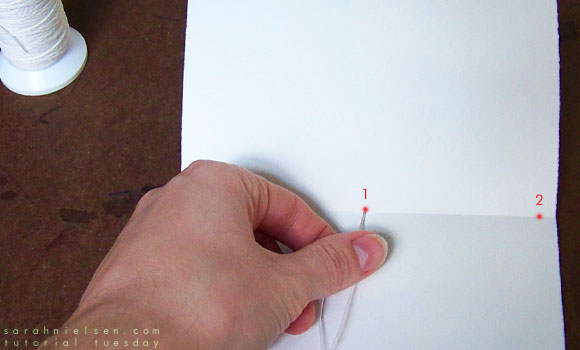
Start at Station 1. Go through the hole from the inside to the outside. Leave a couple of inches of thread here so you can tie off the loose ends once you have finished the stitch.
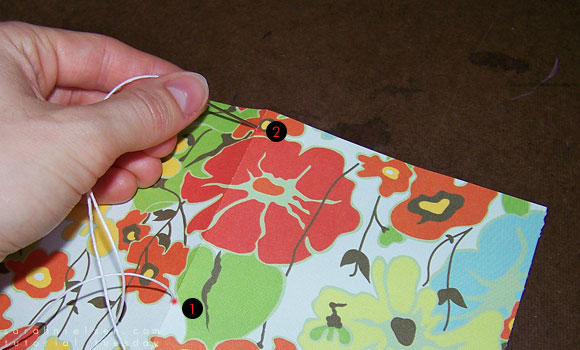
Next, sew through Station 2 from the outside to the inside.
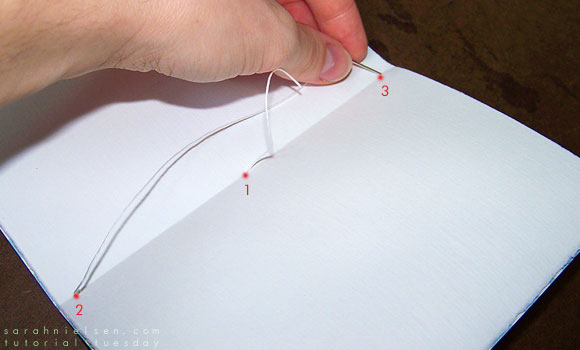
Next, sew from the inside to the outside through Station 3.
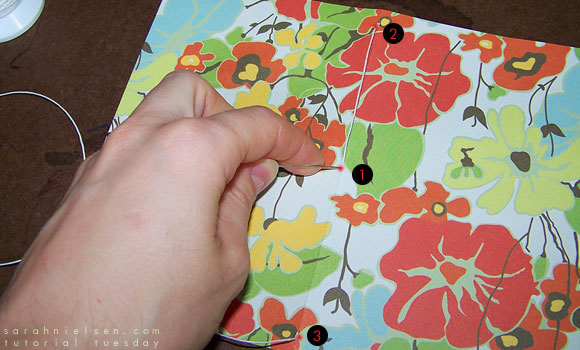
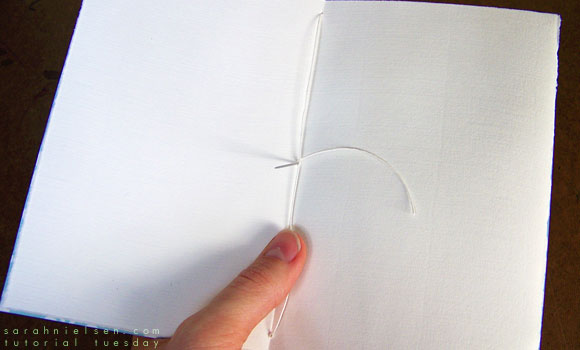
Then, go back through Station 1 from the outside to the inside.
Pull tight and tie off.
STEP 4: Personalize (always!).
Make it your own. Add a name. Add a monogram. Give it a purpose. And then make another one!
Check back later tonight for the giveaway I promised yesterday. I made a set of 3 pocket pamphlets to give to a lucky random winner. All the details will post this evening.
7 Comments
Join the discussion and tell us your opinion.
You have the cutest ideas, and the best part is that I think that I can do most of them! :)
[…] another great tutorial for notebook favors created by Sarah Neilson. The possibilities for these are endless! Coordinate them with your wedding colors and/or theme, […]
Wow what an awesome project, thanks for sharing.
i love books—especially homemade ones!!!
great tutorial–i need to learn how to stitch a book–
TFS!
Your tutorials are so wonderful. You are a great teacher, I love all the pictures since I am a visual learner.
xoxo
[…] pamphlet stitch […]
[…] a little step-by-step pamphlet stitch bookbinding tutorial that I found on Sarah Nielsen’s blog – it has really clear instructions and is […]