Loading cart contents...

tutorial: paper ball ornament
A newly acquired friend, Sara of Craft Snob, asked me to participate in her Ornament Parade. This is the tutorial I shared over there.
This paper ball ornament is quick and easy. You can make enough of these for your entire tree in about an hour! And it’s a great project for your kiddos to help with. Another great thing, is they store flat so they are easy to save for the next year or ship to a loved one as a gift for the holiday.
Enjoy!
How to Make a Paper Ball Ornament
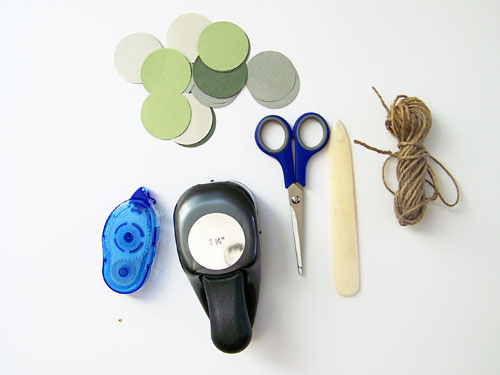
Supplies
Paper
Circle punch (I used a 1.75″)
Double-sided tape (or glue)
Twine
Scissors
Bone folder (optional)
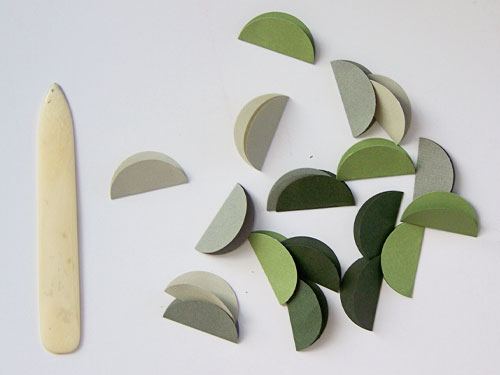
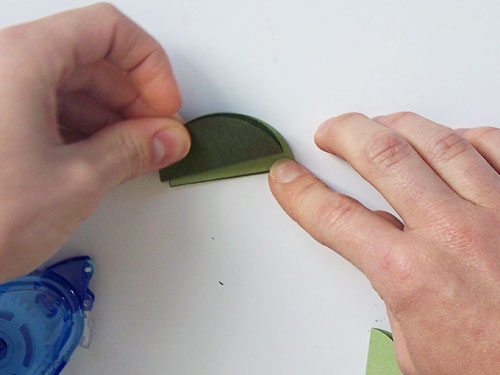
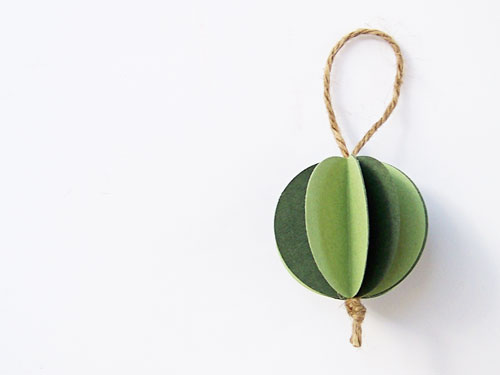
Step 1: Punch out at least 10 circles. For thick paper (cardstock) use fewer circles. For thin paper (computer paper) use more circles.
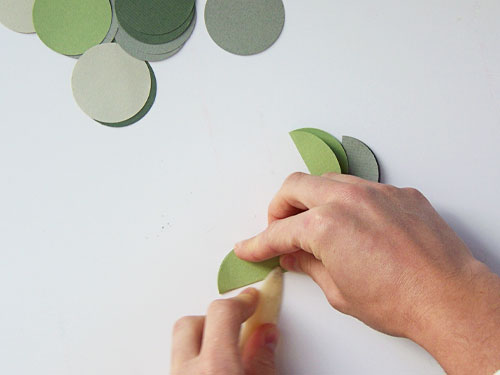
Step 2: Fold each circle in half and burnish with the bone folder.
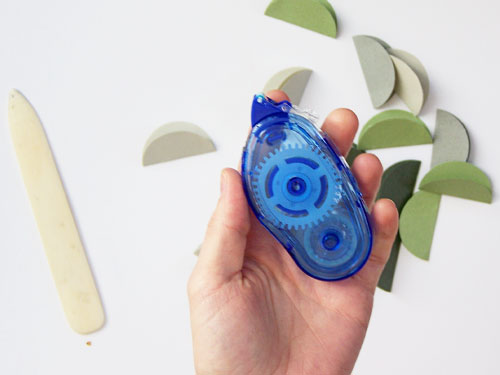
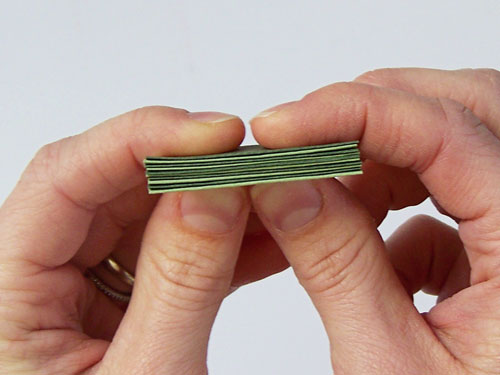
Step 3: Tape (or glue) each folded circle on top of one another, making a big stack.
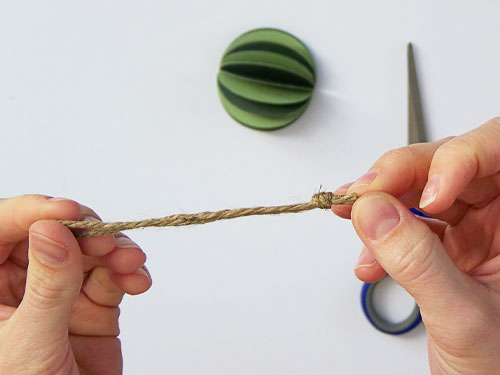
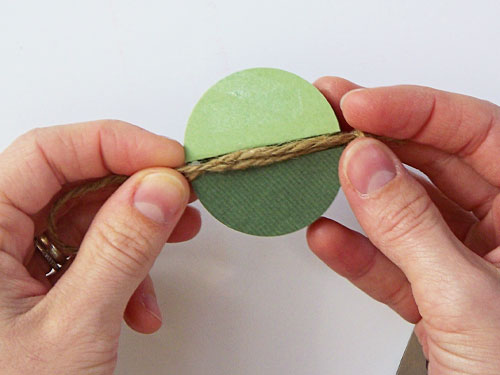
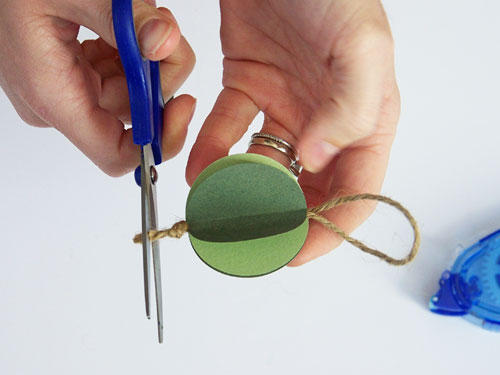
Step 4: Cut your twine (or ribbon) more than double the length of the diameter of your circles. Fold in half and tie a knot at the bottom. Place it in the stack of circles. Glue the first and last circle halves to each other so the ornament wraps around the twine. The knot keeps the twine from sliding through.
I’m going to make a bunch of these and then spray them with glitter. Doesn’t that sound fun?
17 Comments
Join the discussion and tell us your opinion.
love this. what a great idea. you take such lovely pictures.
[…] love the simplicity of this paper ball ornament created by Sarah Nielsen from Book Bound Bindery. This year I’m planning to make a lot of our own ornaments, so I’m definitely going to […]
[…] Sarah Nielsen nos enseña como realizar estos bonitos colgantes. Con el mismo sistema, pero cambiando los círculos por corazones, rombos, o cualquier otra figura geométrica podemos obtener diferentes modelos. […]
[…] (via Sarah Nielsen) […]
Your ornaments look very nice and thanks for the tutorial! I’ve got this linked to my paper ornaments post too today, nice job!
[…] ve akordeon şeklini verebilmek sert bir düzleştirici. Nasıl yapılıyormuş isterseniz buradan bir bakalım. Reklam : Etiketler: ball çam ağacı süsü craft dekoratif el yapımı […]
[…] paper ball ornament Sarah Nielsen […]
[…] Paper Ball Ornament by Sarah […]
Hi there! I loved this so much that I featured it in my “100 Jolly Christmas Crafts & Decorations”! Have a great day! http://www.aspectacledowl.com/100-christmas-crafts-decorations/
[…] Sounds like fun. Thank you Sarah! […]
Thank You for the idea! I just completed this project alternating burlap & a red gingham fabric with the jute cord in the middle! Love it!
Glad to hear it! There are so many possibilities.
[…] Tutorial: paper ball ornament, un tutorial su comer fare delle palle di carta da appendere all’albero di Natale […]
[…] See here the creation process. […]
[…] sarahneilsen.com […]
[…] 8. DIY Paper Ball Ornaments Tutorial via Sarah Nielsen […]
[…] by Remodelaholic’s and Sarah Nielsen:Book Bound Bindery’s ornaments. Sarah has a nice tutorial on making basic paper ball ornaments and even made a very cute video where all the little circles […]